Wednesday, January 16, 2013

Colors of Winter

I love the blue Hawaiian skies....but the winter blues of Idaho are amazing


Aloha A Hui Hou!

Tuesday, January 15, 2013

Forest for the Trees

This is another thing that I found on pinterest/Etsy that I really liked was this Birch Forest painting

you can find it here
Now that we had the Birch tree forest on the wall, I thought a painting like this would be perfect for over the bed.

When I started it I thought I should make it a four seasons piece of art. You know, splitting up the canvas in 4 parts and color each in different seasonal colors.


You see? Like this


My next step was to use the stencil to get the trees on the canvas - not that I couldn't paint them, just thought it would look cool if they were the same.

I had to put on two layers of white to get it to cover the background.


Now to give it some dimension


Again, using the stencil, I added the dark tree marks


Of course I had to add a personal note...


To my surprise the painting totally vanished on the stenciled wall


I thought about putting a frame around it, but didn't want it to take away from all my stenciling efforts.

Hubby and my creative friend Nancy said it would look good on one of the plain walls. So that's what I did, hung it on the other wall


So there you go! We have custom art in the bedroom!

Not done yet, though....this is to be continued!

Aloha A Hui Hou!

Monday, January 14, 2013

Hubby's Side

Since the bed is off center, Hubby has a lot of space on his side of the bed.

I didn't want to waste the space and get matchie, matchie night stands - so we were looking for a small antique dresser.

 On Craigslist I came across an ad for an 1880's washstand


I texted the seller for the measurements and it looked like it should fit.

Cool, huh?

So we drove over to Oregon....

oh, by the way. I just wanted to mention that it is amazing that we can actually drive to a different State

Just get in the car and drive to a different State.

In 30 minutes you're there...in a different State.

Amazing...

Double cool is that it is State where you don't have to pay sales tax....yup, double cool.

Now back on track to the washstand.

The washstand was really solid and a bit rough, very rustic looking and a great match for the antler lamp that Hubby wants to keep for his bedside light.

Of course we brought it home with us.

The wood wheels on the bottom were not totally intact. One wheel was missing and another was really worn down so I decided to remove the wheels and put sliders on the bottom so we don't scratch up the floor.

It's perfect for Hubby and his needs (a place to put his STUFF away)

no, there are no sockets on the wall behind the bed - I'm going to have to figure out what I can do here.
And Goldilocks said "it was juuuust right".

Aloha A Hui Hou!

Sunday, January 13, 2013

Dramatic Winter Sun

Nothing much to say here other than no matter where you are, what time of year it is...Sunrises and Sunsets are beautiful!


I really loved the look and feel of the foggy sunrise.


Love the red lighting on the snow...
It's worth getting up early in the morning to catch the sunrise.

Especially in winter when the sun doesn't go up till 8:30AM!

Aloha A Hui Hou!!

Saturday, January 12, 2013

Our Mantel

I was so looking forward to hanging our stockings on our mantel!


You cant tell in the pic, but I had a small string of lights running thru the pine vine.

On the other side, that I forgot to take a picture of, I had the mantel clock with an artificial pine vine and a couple of cute felt birds that I found at target. I think it looked very nice, but then again I'm a bit biased.

All in all I loved how it looked and the cozy feeling it gave the mantel.

I still have that empty corner in the back that I don't know what to do with.

I guess that's something to think about for next year.

Aloha a Hui Hou!

Friday, January 11, 2013

What to do with the Bedroom?

In the planning phase I was thinking of putting reclaimed wood on the wall behind the bed.

Two things made me drop that idea. First was that it might be too heavy and make the room look and feel smaller. Second, I didn't want to spend 1000+ bucks on it.

So I started looking at my other idea, stencils.

I really liked the birch tree forest stencil that Cutting Edge Stencils was offering. Stopped by their site almost every other day, drooling over it.


When it went on sale in November, I jumped on it. I watched their tutorial videos, read up on the technique and was sooooo ready when we got there.

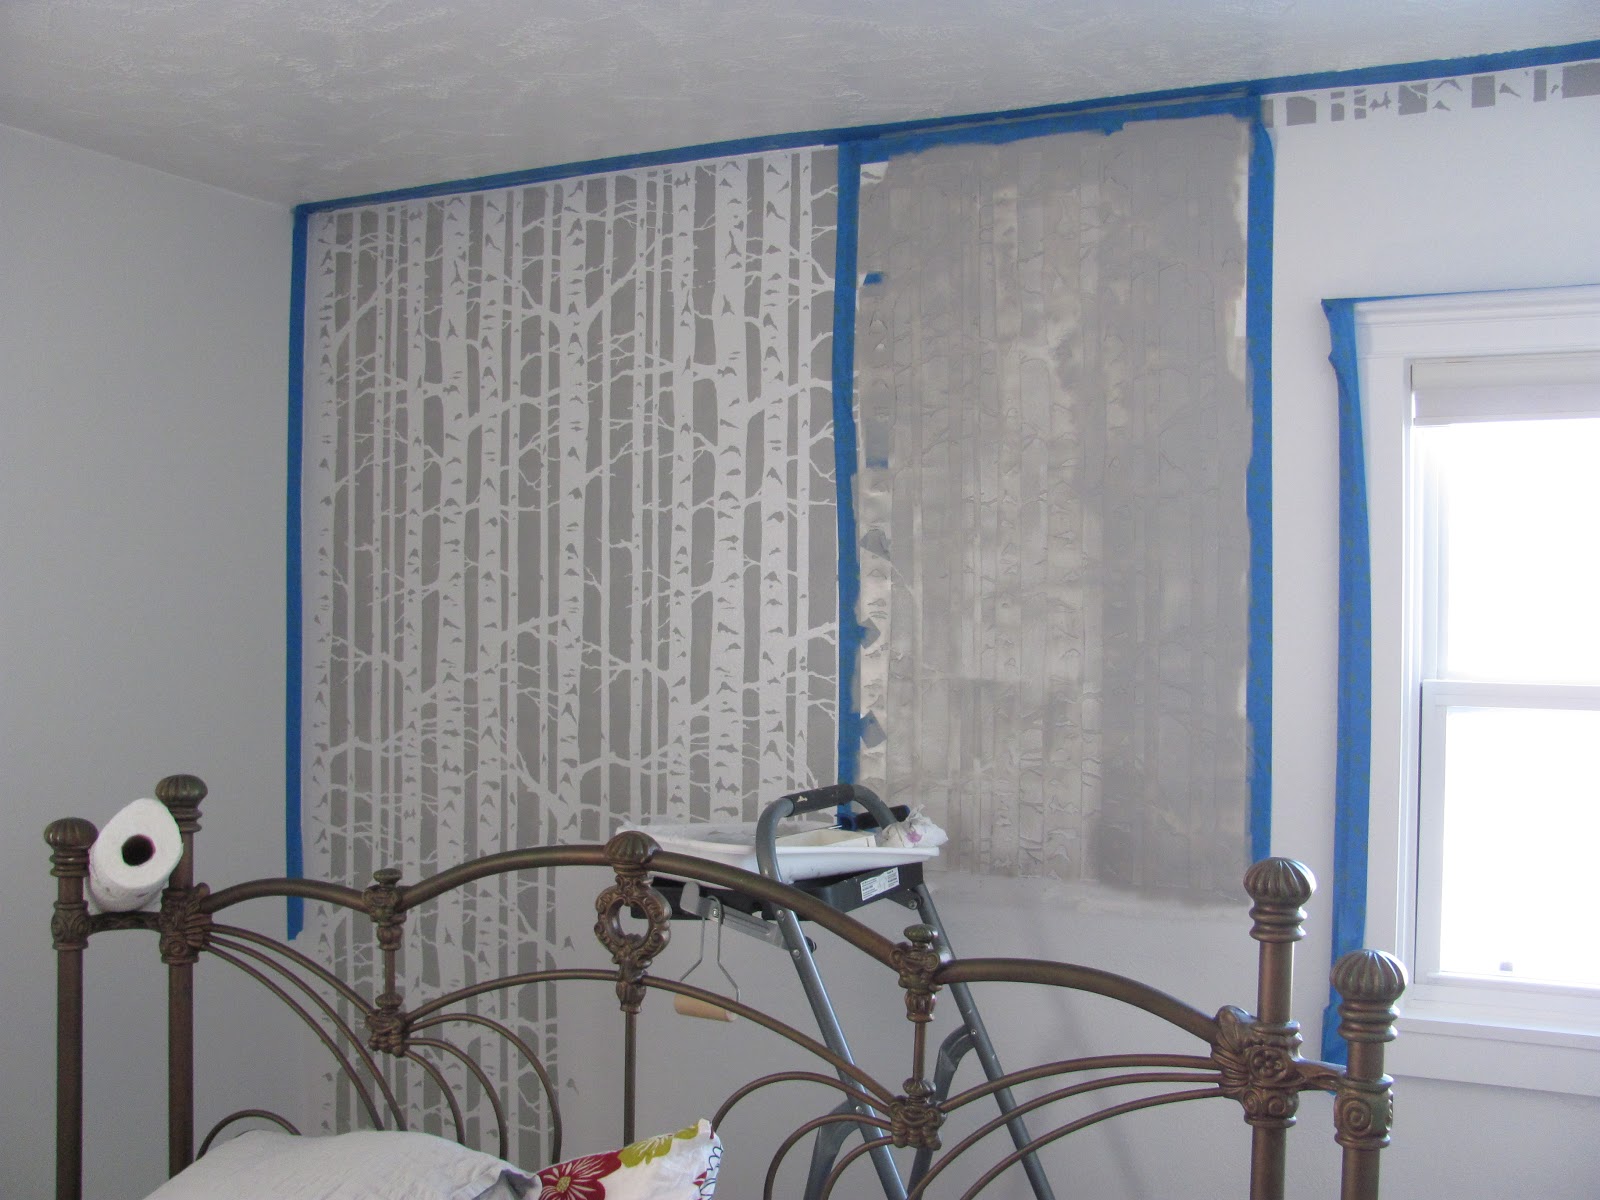
Because the stencil was a negative stencil (stenciling the back ground and not the tree) the first thing I had to do was paint the wall white.

You can't see much of a difference, but there is.


My roller brush was ready to roll, but I'll admit, I was a bit scared to start...


Ok, first bit done. Looks like a barcode, doesn't it?


It was at this stage that I realized that because the walls are textured I'm going to have to put spray glue on the back of the stencil.


After the 3rd application I started to notice that the edges are not as crisp as the first use.

I hurried down to the laundry room to clean the stencil. What a piece of work that was!  We have a large utility sink, but it wasn't wide enough to lay the stencil flat.

The paint that peeled off the painted side stuck to the spray glue on the other side....in short, it was a mess and absolutely no fun to clean.

But I started, so I had to finish the job.


After each application I stepped back and loved watching the forest grow before my eyes.


As you see, the left corner is really narrow. I didn't want to fuss with trying to squeeze the stencil in there, so I just turned it into a wider tree.

Down the road, when I find the right ones, the curtains will cover it up.


Done!

It was so worth the effort and we love, love, love it!

Shared with:
Funky Junk Interiors
City of Motherly Love

Aloha A Hui Hou!

Thursday, January 10, 2013

Not Much Space

You might remember, this is our bedroom, we just moved the bed over there before we left last Summer.


Although both bedrooms look the same, they're not. The light room is smaller and it doesn't leave me much space on my side of the bed.

Hubby said "Move the bed over and you'll have room".

Well, I don't know about you, but I have issues with a bed in front of the window.  First it makes it hard to get to the window and second it just looks off balance.

I was thinking of building my own nightstand to get the size I need. On this trip I thought I'd look around and see what I might like and might want to give a shot at building myself.

Then our neighbor took me to Grapples. This is a "little" home decor business that is only open once a week, and it looks different every time you go there.

Staring at me was this little side table in the exact same green patina as on our bed frame.

I don't have to tell you, you know I took it home with me and it fits perfect!


As you see, I also found a lamp shade for the hobnail lamp I found a couple of months ago. 
Love the vintage feeling in the room now.

Aloha A Hui Hou!


Wednesday, January 9, 2013

Paint Brush in Hand

Quite some time ago I saw this painting on Etsy

found here
and loved it.

She was selling it as cards and prints, but I wanted it bigger and on a canvas. The fact that I didn't know where to hang it didn't matter. So there it sat, in my Etsy shopping cart, waiting for me to figure it out.

Fast forward a few months and I'm watching the Property Brothers (love those guys and what they do!) and they were renovating a house for a fun couple. The wife told Jonathan that there is a painting of a pair of cows, by their favorite artist, that they would love to have in their kitchen - and BAM the lights went on - I could hang it in the kitchen!

I was looking forward to our next trip to the house and I could tackle this myself. Little did I know that it would be so soon.

Here is my progress, from blank canvas to finished painting.


First I outlined the chick and the tea cup


Then I started filling in the back ground and the waves using paint brushes, paper towel and my fingers to get the blend of colors just right.


Starting to fill in the cup, highlighting the waves


Giving the chick some life, adding more motion in the waves


Now it's on the wall and looks like it was meant to be there.

Even my Hubby is impressed!

Shared with:

Funky Junk Interiors
Six Sisters Stuff
Craft Berry Bush
Boogieboard Cottage
I should be mopping up the kitchen floor
Under the table and Dreaming
City of Motherly Love

Aloha A Hui Hou!

Tuesday, January 8, 2013

A Lesson in Feeding Birds

When we were at the house during the Summer there were a lot of birds flying around and we thought there might be just as much in the winter...

And you know what? We were right.

There were a lot of birds. So many we decided to get a bird feeder.


We filled it with a fancy mix, tossed some feed on the ground and hung the feeder just out side our kitchen window and waited for all the birds to show up.

And we waited

and waited

and waited.....

The birds (chickadees) would go for the stuff on the ground, but wouldn't go near the feeder.

Maybe it was too close to the window? So I moved it out a bit. Still no birds - only Hubby bumping his head on the darn thing.

Maybe we have stupid birds? Or birds that have never seen a feeder before? Maybe we have to have to train them?

I put a pile of feed on the ground and let the birds come and eat.

After I knew they would eat in that spot I put the feeder on it and they started checking out the feeder.

Last step was to hang the feeder back up and EURIKA! They started eating out of the feeder!


It was fun to watch them eat and defend their feeder.

Hope the seeds last a while.....Wonder if any other birds found the feeder?  Guess we will have to wait till we live there to know for sure.

Aloha A Hui Hou!