Showing posts with label Kitchen. Show all posts

Thursday, July 4, 2013

A Place to Hang My Cup

You know when you've found a good coffee cup when you hold it and if feel perfectly balance, not too hot, your finger doesn't get stuck in the handle….perfect.

Well, I fell in love with this shape from pyrex.


 I haven't found them in my crazy daisy pattern yet, so I'm keeping these on hand till I do.

Anyway, I've always wanted to have cups ready on the counter, but never had the counter space. Now I do! So I went hunting at my local and not so local thrift shops to see what I might find and came across this for the magic price of 65 cents. Mine!


I liked the lines, but it's a little unbalanced and kinda dark, so I got to thinking…..and came up with this


Add a base to it…paint it….figure out how to attach it…Simple!!

Drilled a few holes, painted, sealed, attached with wire and presto - new STURDY cup holder!


Sing it with me….now it's solid! Solid as a rock…dum dum….yeah!

Aloha A Hui Hou!

Saturday, January 26, 2013

A Little Somethin, Somethin

Not an exciting entry, just what I drew on the chalk wall for Christmas.


I couldn't think of anything spectacular for New Years, so right now it's just a chalk-ie mess.

I'm going to have to get a spray bottle to clean it up as the eraser is ripping up on the magnet paint and when I wipe it with a wet sponge, the sponge falls apart and I just have a chalk mess.

That's all for now folks!

Aloha A Hui Hou!

Wednesday, January 9, 2013

Paint Brush in Hand

Quite some time ago I saw this painting on Etsy

found here
and loved it.

She was selling it as cards and prints, but I wanted it bigger and on a canvas. The fact that I didn't know where to hang it didn't matter. So there it sat, in my Etsy shopping cart, waiting for me to figure it out.

Fast forward a few months and I'm watching the Property Brothers (love those guys and what they do!) and they were renovating a house for a fun couple. The wife told Jonathan that there is a painting of a pair of cows, by their favorite artist, that they would love to have in their kitchen - and BAM the lights went on - I could hang it in the kitchen!

I was looking forward to our next trip to the house and I could tackle this myself. Little did I know that it would be so soon.

Here is my progress, from blank canvas to finished painting.


First I outlined the chick and the tea cup


Then I started filling in the back ground and the waves using paint brushes, paper towel and my fingers to get the blend of colors just right.


Starting to fill in the cup, highlighting the waves


Giving the chick some life, adding more motion in the waves


Now it's on the wall and looks like it was meant to be there.

Even my Hubby is impressed!

Shared with:

Funky Junk Interiors
Six Sisters Stuff
Craft Berry Bush
Boogieboard Cottage
I should be mopping up the kitchen floor
Under the table and Dreaming
City of Motherly Love

Aloha A Hui Hou!

Sunday, September 30, 2012

Storage, storage, storage

Our kitchen is storage heaven and I can't wait to get organized, everything in it's place.

And yet, with all that space, there still are a few possible storage problems that I have been thinking about.

1) How to make the corners accessible in the upper and lower cabinets

(excuse the mess)
2) Since the shelves have a fixed height all the way around, I would have some lost space on some shelves and others would be too short. 

(This cabinet was not original to the kitchen)


I knew I couldn't get around the too short part - but maybe the lost space could be salvaged. 

3) How am I going to get to the way back of the deeper, lower cabs? Without spending a ton of money on those metal pull outs that were made for modern, one size fits all, kitchens cabinets?

This is just where I put things for now.
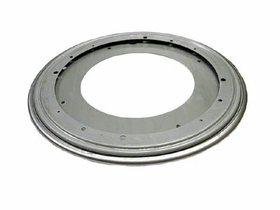
For the uppers, the corner solution is easy. Just make a batch of lazy Susan's and put them in the corner.
Photo source

But what to do with the rest? 

Well then I saw this post from "With A Blast" at the "I should be mopping the floor" link party


Great solution for the lowers! I can custom size these to fit the space I have and not worry about what is available to buy!

Thank you so much for the idea Linda!

Now all I need to do is figure out what to do with the deep lower dead corners. Suggestions? Anyone?

Aloha A Hui Hou!

Friday, September 28, 2012

Things I did not know about granite

I was so excited that we opted for granite countertops

I was so happy on this day! Amazed how everything was coming together.
and I wanted to be sure I knew what to do and how to care for it.

I was told that all I had to do was seal it once a year.

...and I thought great, low maintenance (yes!!!) and was good with that.

So imagine my surprise this Sunday when I came upon an article about the care of granite counter tops.

What I did NOT know was that I can't use all purpose, ammonia or bleach cleaners. 

The article says that cleaning products that contain vinegar, lemon or other acidic ingredients can dull the surface, reducing the stones luster and eating away at the sealer. Ammonia based cleaners should also be avoided as they can cause the stone's surface to wear off over time. 

That means I have to read the labels of my cleaners and make sure they don't contain any of the above (i.e. lemon dish washing liquid).

Also, do not try to scrub off something that has dried on your counter top. That green side of your sponge can also damage the surface of your granite counter top. 

Who would have thought that a something like a green sponge could scratch something as hard as granite....well when you think about it, maybe.....but would I think about it? or would I have just tried to get what ever was there off?

What is your granite care tip or wisdom? 

I'm dying to know!

Aloha A Hui Hou!


Sunday, September 23, 2012

It does work!

Well...I am always on the look out for a cool kitchen tip that might save me time...

or money...

or both..and I found one.

You wouldn't believe how fast bananas turn brown here.

We buy them on Saturday, green as can be, and by Monday they are already soft and have big brown spots.

We've tried those Green Bags and although they kept their color longer, something about the banana changes - Don't know how to explain it, but the banana "feels" different and they tasted horrible....really, really horrible.

I hate to think what ever that taste is, is doing to my health...yuck, yuck, yuck!


On Pinterest I stumbled upon a tip to keep banana fresher, longer - They say cover the top (where the banana are joined) with aluminum. No real explanation why, just that it works.

So I give it a try and guess what? It works!


Well at least on the peel doesn't brown and break down as fast. The fruit itself continues to ripen. But was aren't freezing as many bananas these days....and that's a good thing!

Give it a try!

Aloha a Hui Hou!


Sunday, September 9, 2012

Revisited - Fridge Door Handle Covers

I mailed the covers I made to the house and they were so kind to put them on the fridge.

I think they look great!


Sorry for the low res, but you get the idea. She also said that the cover fits perfectly on the freezer drawer. So I can just go ahead and use the same measurements for the freezer handle cover. Cool Beans!

So, have you made your cover yet?

Aloha A Hui Hou!

Wednesday, August 15, 2012

DIY - Tired of Fingerprints and Smudges

It's been weeks since we've returned from our trip and I can't stop thinking about how smudged up the door handles of our stainless steel fridge/freezer were and how I wound up wiping them down every time I walked by. I had to come up with a solution.

In one of the care homes I worked in they wrapped the fridge door handle in Saran Wrap to keep it clean. It worked, but I didn't want to be that wasteful.

Then it came to me. Why don't I just sew "handle covers"?

I knew I wanted some kind of green, Aloha print, quilted fabric, but didn't find anything I liked at the fabric store.

On a whim, at the thrift store, I went thru the bedding isle and found a small throw in just the right color.

Cha-ching - MINE!

First, I carefully took off the bias tape so that I could reuse on my covers.

Then I took measurements and cut out what I needed to make each cover.


Then pinned the bias tape all the way around and sewed it in place.


Next I wrapped the cover to be around the handle and using a vanishing marker I marked where they over lap. 

This marks lets me know where I need to sew the velcro.


I decided to only add a few spots of velcro instead of a long strip. Thought it would be less bulky this way.


Once the velcro was in place I wrapped the cover around the handle, with opening facing me.

I pulled it nice and tight, pressed the velcro dots together.

This is our fridge in Hawaii - excited to put it on our other fridge.

Then, ever so gently, I turned the cover around so the seam was in back and wah-la! A nice cover that won't show smudges and that I can toss in the washing machine when it gets dirty!

I made 2 for the french doors, but will have to wait till we're at the house again to measure how big it has to be for the freezer drawer.

What do you think? Maybe I'll go into production!!

Aloha A Hui Hou!

Shared with:


UndertheTableandDreaming


Thursday, August 2, 2012

Product Review - Bag Clip from Jo!e

I had some time to kill while Roger went on his 10K walk, so I wound up at Schnick Schnack heaven - Bed, Bath and Beyond.

I have to admit, going to this store was a bit of self torture...seeing all these cool things, and I saw a number of things that I would have love to have, BUT why buy it now and wind up paying to ship it to Idaho?

Some time common sense wins over the satisfaction of buying something cool, which we all know only lasts for a bit anyway.

I'll admit that I did buy one thing though, because it is something that I could really use, not only a cool thing to have.

I bought a giant clip from Jo!e called "Bag Clip".

Jo!e always has cool stuff

Just sayin...


"Yeah, but what is it?" you may ask...

It is a clip you can use to re-close any plastic bag.


The clip is available in 4 different colors: red, green, yellow and orange and I paid just under $3 for it (is most likely a lot cheaper on the mainland).

The over all length is about 10". The clip-able length is about 8" and is very easy to use.

Pull it apart, lay the bag as flat as possible over the white part, push the orange part down.

It's that easy!

The clip holds tight enough that you can't pull the bag out.

Although it is a tight fit, it isn't too hard to pull apart to open.

The contents in the bag remained fresh.

Not that the bag had the chance to get stale.

It doesn't mention if the plastic can take freezer temps, I'll have to try that and get back to you.

Over all it's better than the clothes pin, rubber band or twisty I usually use and very much worth the 3 bucks.

I'll give it a 5 out of 5 and that's all I have to say about that...

Aloha A Hou Hou!

Saturday, July 7, 2012

From Drawings to Reality

OK, last entry about the kitchen...for now...I promise.

When we were at the house last year I sketched, on scrap paper, what I envisioned the kitchen should look like.

While sorting thru some papers, I was happy to find that the contractor had saved them. Yay David and Lisa!

So cool to see that the kitchen turned out almost EXACTLY the way I sketched it (will get to that below).

Down to the lamp, just the way I hoped it would look like.

Closing those shelves make the place look so much tidier. 

Great looking wall of cabs - amazing amount of storage!

Here is where we made a slight change. I skipped the plate rack and opted for a spice cabinet.
Amazing what can happen when you get the right team together. Thank you again Lisa and David and the rest of the crew!!

Aloha a Hui Hou

Tuesday, June 26, 2012

HGTV's Rate My Space

I love the transformations of our kitchen and Bath so much that I posted them over on the HGTV Rate My Space page.

Stop by and check my posts, here and here and Rate my Spaces! (Clicking on the underlined text will take you to their page)

Aloha a Hui Hou!

Monday, June 25, 2012

Re-styled clock

OK, to tell this one I'm going to have to go waaaay back...around 7 years back....

There we were, still living in Waikiki, still diving...you know, back in the day. Rogers' old kitchen clock gave up and we needed a new one. I got lucky at Pricebusters and found a kitchen clock for a buck fifty....I can't even buy a quartz mechanism for that money. Of course I bought it. It looked kinda like this

We enjoyed the clock for a few years, until IT gave up. So I was looking for a new clock. On eBay I came across a seller that will personalize your kitchen clock. I picked one out and had it personalized.

The tops of the hands were originally black and they didn't pop off the face of the clock so it was hard to see the time. I took it apart and painted the tips red...there, that's better. Another thing, the clock was kinda small.

But wait, I'm crafty. I still had the other clock and the black clock fit EXACTLY into the middle of the frame from the other clock, so I glued it in place. To match the faceplate I painted the silver trim gold and the outer rim a tan color. It looked great and really fit in our kitchen.

I was looking forward to hanging it up in our new kitchen. So I packed it up and shipped it over.

Now I have some good news and some bad news. The good news it made it from Hawaii. Bad news is  that even though I packed it very well, the plexiglass had a small crack...but I think I can live with it.

ANYway, looking at it next to the cabs - the colors didn't work. That meant I could go to the craft store - which can always be a dangerous thing - and buy some paint. Which I did, along with some other craft items...of course.

This is how it turned out. I think it goes well with the colors in the kitchen and fits perfectly over the new archway.


I love that we have things that are uniquely ours.

Aloha a Hui Hou!

Thursday, June 14, 2012

Antiquing

On our trip we did a bit of "antiquing". Nothing big, just a few small items to give our house a home-ie feel.


Let's start with the small Kraft American crate we found in a little antique shop in Caldwell. I have a crate here in Hawaii for our condiments, but it is new, made to look old. I like this MUCH better.

We had been shopping around for a spoon rest and just couldn't find something we liked - Till I saw this baby at a thrift store. In Germany it's called milk glass, unsure if that its what it is called here. On the inside it has fruit embossed on it and on the out side there are flowers. Easy to clean and dish washer safe! Just the way I like it.

The "green" collection
Currently I don't have room to store any vases, let alone have any flowers in the yard that I could put in one...so I don't really have any (I'm cheap, Ok? I don't want to PAY for flowers...lol). But at the house I will have tulips, lilacs, iris, roses and and and, so I'll be needing vases. We stopped at a local thrift shop and I became obsessed with green glass. It's all older glass and I was able to make a killing. I got it all for under $15....cool, Huh?

Vintage Mason Jars
For months I've been ogling the canning jar soap pumps that Post Road Vintage has been offering on Etsy. I planned to order 2 before we flew, but just didn't get around to it.

In the first antique shop we found a quart size jar and I thought "wait a minute! I could make that!"  Taking another look at the jar I came to realize that a quart size jar would be a bit too big to fit on the ledge of the kitchen sink.

So we kept looking. We got lucky at the thrift store and found 2 pints, two more quart size jars (that I could always use as vases) AND I found two soap dispensers with metal pumps. I was in business!

Our neighbor was so kind to drill a hole in the lids and with a glue gun I was able to secure the pumps in the lids. I love making/creating things for the house that will get some use.

The bedroom doors had the original brass door knobs, but they had seen better days. At one of the other antique stores in Caldwell we were able to get two beautiful glass door knobs.


I put them on the doors and they feel great in the hand.

The door to the wood room is still the original wood and looks great. The doors to the light room and the bathroom are painted. I hope to strip them and find that they are as beautiful as the other door.

Can't wait to get back and find some more treasures!

Aloha a Hui Hou!

Monday, June 11, 2012

No, no, no, no, no

I did want to mention that not everything was sunshine and lollipops.

So, the time was coming for our HGTV moment. As we are driving along I notice that I received an email from the painter with a picture of the cabinets. The Queen was not happy.

I know we talked about it before, having the cabinets look "worn" and I figured out that I didn't want that. It looked fake and messy. I wanted it to look like this:


Not like this:


My excitement of seeing the house, that had been building up for weeks was shattered. I dreaded going in and it put a damper on everything that they did so well.

The rest of the cabs were even darker and one of them had this on it


Is that creepy or what? Roger said it looks like the "Shroud of Turin". Not to mention that strange things happened while that face was up on the cabinet...the water pipe popped off the sink, flooding the basement, our ice cubes grew stalagmites.....just plain strange.

Lucky for us this was a decent painting company and they came in and repainted the kitchen


Love how it turned out!

Aloha a Hui Hou!