Monday, September 24, 2012

DIY - Pillows to match

You might remember my Rag quilt that I posted here.

Well I finally got the opportunity to sew pillow cases and throw pillows to match.

Two of the three pillow cases and one of the throw pillows.
The throw pillows are all envelope pillows - no zippers. Much easier and much quicker to sew.
I found a shop on line and ordered fringe and cord trim to give the pillows a little somethin' somethin'.
The cord went well with the light colored fabric


The fringe went well with the dark print.


But neither went well with the blue. 

So I thought and I thought and I decided to trim it just like the blanket. I had a narrow strip of fleece left over, so it put that between the two (three) layers of blue. Sewed it with the seam on the right side out and then snipped it all the way around. I really like the way it turned out and it goes perfectly with the blue.


If anyone is interested in the fringe, let me know and I'll dig up the link.

Aloha a Hui Hou!

Sunday, September 23, 2012

It does work!

Well...I am always on the look out for a cool kitchen tip that might save me time...

or money...

or both..and I found one.

You wouldn't believe how fast bananas turn brown here.

We buy them on Saturday, green as can be, and by Monday they are already soft and have big brown spots.

We've tried those Green Bags and although they kept their color longer, something about the banana changes - Don't know how to explain it, but the banana "feels" different and they tasted horrible....really, really horrible.

I hate to think what ever that taste is, is doing to my health...yuck, yuck, yuck!


On Pinterest I stumbled upon a tip to keep banana fresher, longer - They say cover the top (where the banana are joined) with aluminum. No real explanation why, just that it works.

So I give it a try and guess what? It works!


Well at least on the peel doesn't brown and break down as fast. The fruit itself continues to ripen. But was aren't freezing as many bananas these days....and that's a good thing!

Give it a try!

Aloha a Hui Hou!


Saturday, September 22, 2012

DIY - Welcome Table - Take 2

In my last post I left you hanging...waiting for a call back from the lady selling the vanity mirror for $65.-.


Well, I waited and waited and waited and she didn't call back. I was disappointed.

I went back to the post and saw that she only had her shop open on Thursdays, so I gave it another shot and guess what? She picked up the phone!

Now the bad news. She said she didn't get my message and sold the mirror the day before.

But here is some good news, she sold it to another antique shop. She was kind enough to give me the contact information of the shop that bought it and I called there.

They picked up right away and found that they still had it and wanted $100 for it.....Wow! what a profit in just one day! I asked them if that was the best price and they said yes. I thought a moment and decided to ask them to hold it for me and let them know a friend of mine would stop by to take a look at it.

Since my friend was in the neighborhood she was there in nothing flat. She called and said the mirror had a bit of hazing, but the frame looked really good. It was up me, if it was worth $100.

We talked back and forth a bit, and then I talked to the lady and was able to get the price down to $79...which was ok.

So now this beauty is resting in our shop and waiting from me to give it a new purpose! Woo hoo!

Aloha A Hui Hou!

Monday, September 17, 2012

Welcome Table

Browsing thru the blogs I follow I found this at Domestic Imperfection

Photo from this blog
and I love it! She made it out of this

Photo from this blog
Since I saw it, in my minds eye I've been seeing it on our front porch, the table top a bit wider so I could put a vase on it, some seasonal decorations.....

This morning I was cruising Craigslist and found this:


Tell me, what are the chances of finding THAT close of a match?

Slim!

I know, right?

I called and left a message. So hope they get back to me and still have it.

Keep  your fingers crossed for me!

Aloha A Hui Hou!

Sunday, September 16, 2012

To Paint the Porch Ceiling Blue

The couple of times we have been at the house we have had LOTS and LOTS of wasps trying to nest in the corners of the ceiling of the front porch and the back Lanai.

Last year when the contractor went up to fix the roof he was attacked by wasps.

I'm sure part of it is because there was no one there - to them it was a nice, quiet place to call home.

But it isn't anymore.

In many HGTV episodes people have mentioned that if you paint the ceiling of your porch blue, bugs think that it is the sky, where birds could easily catch them and they fly for cover...or something like that.

photo from this site


I was kind of torn between wanting to believe it and thinking that bugs would never fly out in the open if they were afraid of the sky.

So I did a little bit of research and this is what I found out.

Way back, some people believed that if you painted the porch ceiling a soft blue-green color it would keep Haints, restless spirits, away. The color was actually called Haint Blue.

Then there was an article that mentions that back in the day, when they first started painting porch ceilings blue, people used milk paints and in most cases lye was mixed into the paint.

That explains a lot. Lye is known as an insect repellent and THAT's why bugs would avoid spending time and building nests on the porch ceiling, lamps or ledges. You also have to know that milk paint fades over time...and it gets painted over with more milk paint = more lye. It was like a new treatment with every coat of paint.

So I guess, when we redo the back lanai (it has a poor slope), we'll be painting the ceiling with milk paint (I might have to research if lye may cause a health hazard for humans - I'll keep  you posted).

....and now you know the rest of the story!

Aloha a Hui Hou!


Friday, September 14, 2012

Back in 1999....

When I traveled to Hawaii for the first time, I rented a Sebring Convertible.

And I fell in love....

But I knew it would be a love that couldn't be...because they didn't sell Chrysler Sebrings in Germany.  

At that point in time I never....ever....thought I would end up in Hawaii.

But Life happened and I wound up in Hawaii and after a few years my car dream came true and I bought my first Sebring


and I named her Gracie. She was cheap and wasn't perfect. She had some many flaws. The hood wouldn't close all the way, not all the windows worked, the top had to be closed by hand.....and, and, and but she was a Sebring and sitting in that driver seat, I felt at home. We had wonderful, topless times together. 

Then, a little more than a year later, October was coming around and the time for her to get the annual safety check getting close. One thing was sure, she wasn't going to pass and the money needed to fix her - the math just didn't add up - so I had to let her go...and missed her every day.

Since we had a 2nd car and we didn't really NEED to have two cars, we opted to be frugal and not to get a replacement.

Fast forward to January 2011 - I was unhappy, always stuck in the apartments, bored out of my gourd and  it was time to get another car. I was lucky and oh so blessed that I was able to get another dream car - A newer model, much better condition

Enter stage left, Dolores, Dolly for short...

Actually won a photo contest with this picture and it landed in a Sebring Convertible Calendar
Daily morning drives to the beach, cruising the Island with the top down - I was me again! Loving Island life, still in love with a Sebring.

Last November hubby had his right of way taken and the accident totaled our other car. Here is the post about that mess.

Hawaii is a no fault state - no fun.

My tip for you, if you are ever here, never, ever have an accident in Hawaii.

Anyway, this time the decision was different. We had other things to take into consideration. We bought the ranch, we might be moving...maybe...having two cars, it was complicated. I didn't want to load a 2nd car if we were going to move...and who knows when that could happen? Sooner? later?.  So No 2nd car for us.

Dolly was our one and only and this time I took it in stride. If I needed a car, I'd drive Hubby to work and pick him up again. On the weekends I got to go for my beach walks and be the driver when we went shopping and such. It was a part time love affair.

Last week I had a friend visiting the Island and I drove Roger to work so I could have the car. We had a great time driving around the Island. Visiting some beautiful places - enjoying topless views. 


This week Wednesday hubby arrived home from work, much later than usual. He said that Dolly over heated and he had to stop several times on the way home. Said she kept dying on him.

So he called in and stayed home from work yesterday to take the car to the shop. They called and said that as far as they can tell there is a part that is broken. It might solve the problem - it might not. they won't be sure until they fix the part they see is broken. I was feeling a bad case of deja vu.

We sunk a lot of money in our Astro van and it wound up dying anyway - losing all the money we put into it.

We weren't about to let that happen again.

So unhappily we went to the dealership and traded Dolly in for a new car. Not a convertible, but for an economical 2011 Hyundai Accent. We don't have a name for her yet.....but that'll come, once we get to know each other better...


Aloha A Hui Hou!

Tuesday, September 11, 2012

Have you forgotten?

To all that perished, to all that lost loved ones and friends....I still grieve for your loss.

I remember where I was, what I was doing and I know, I will never forget....


Aloha A Hui Hou!

Sunday, September 9, 2012

Revisited - Fridge Door Handle Covers

I mailed the covers I made to the house and they were so kind to put them on the fridge.

I think they look great!


Sorry for the low res, but you get the idea. She also said that the cover fits perfectly on the freezer drawer. So I can just go ahead and use the same measurements for the freezer handle cover. Cool Beans!

So, have you made your cover yet?

Aloha A Hui Hou!

Sunday, September 2, 2012

DIY - Bleached Coral Pillow

 A while back I painted a coral pillow and shared it with you here


I love how the pillow turned out, but it does feel a bit "hard" where the paint is.

So I got thinking about a bleach technique that a friend of mine shared on her pinterest page and that it might be the solution I was looking for.

According to the instructions you would need:

Colored fabric
Stencil (If you are making your own you will need poster board, a pen, cutting board and a cutter)
spray glue
tape,
Ruler/yard stick
Black Permanent Marker
Rubber Gloves
Plastic Foil
Newspaper
Paper Towels
Spray bottle filled with a 50/50 mix of water and bleach

The first thing I did was photo copy my pillow and piece together the pages to make the pattern for my stencil.

I laid it on top of the poster board, and pressing firmly I traced the design onto the poster board. Using the cutter and the cutting board below I cut out the coral design.


 I spread out some newspaper, laid out my stencil and sprayed the back side with spray glue.


According to the instructions on the glue can, it has to air dry for about 15 minutes before I can place the stencil on my fabric (this way it remains tacky and I can pull it off a couple of times). I did have to respray the stencil after the 2nd and 4th use.

Which is good, because I had some taping and measuring to do

First I spread plastic foil on the table and since I was working outside I taped it down.

Next I measured the middle of my fabric and the middle of my design. Using a permanent marker I marked the lines where the fabric should be and marked the corners where the stencil needs to be.


Then I added some more cardboard so I wouldn't mess up the rest of my fabric with bleach. I pressed down all edged of my stencil firmly to ensure I get a sharp edge.


On my first try I used a 50/50 mix of bleach and water in my sprayer bottle. I squirted the open area of my stencil and right away dabbed off the extra solution using paper towel so it wouldn't spread too far and so my stencil wouldn't get soaked. When you know you'r done spraying, pull off the stencil.

This is what it looked like after 2 sprayings and about 35-40 minutes


It didn't get as light as I had hoped and it leaked a bit, making the branches look a bit chunky.

Let's try this again.

But this time I used 100% bleach in my spray bottle.


AH! Much better!! It is much crisper and not pink. I repeated this 3 more times.

After it line dried I went ahead and washed everything. Then sewed envelope pillows.


Oh and remember the first pillow? Well I went head and traced the outline of the coral branch with a black marker and it made it look much, much better


No two pillows are the same and it definitely is a playing game, getting it just right. Not spraying too much, not too little, wiping it down right away. So go ahead...PLAY!

Aloha A Hui Hou!

Shared with:


UndertheTableandDreamingSixSistersStuff.com

 mop it up mondays


Friday, August 24, 2012

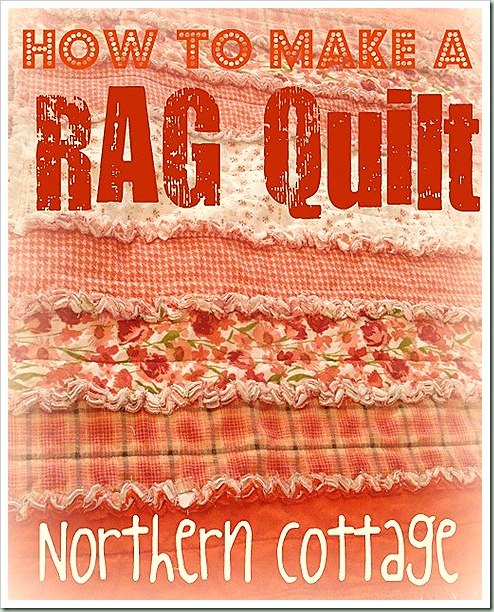
DIY - Rag Quilt

I've had the fabric for weeks, ever since I discovered a blog entry by Northern Cottage called

you'll find the instructions there
This week I finally got around to it. It was a lot of sewing and was a bit awkward to sew because my sewing table is really small and the weight kept pulling me off track.


I wanted to use up all the fleece and wound up with 9 - 10" strips and 2 - 8"strips


I do want to mention that I changed it a bit by using fleece instead of flannel (The only flannel I could find was in kiddy patterns and I wanted Aloha prints) and did not include the extra, in between layer. Sorta like this:


 Snipping wasn't nearly as much work as I thought it would be. It is thicker than the flannel version, but I think it looks just fine.


Even the fleece has an Aloha design.

All in all it was a fun project and I'm really, really pleased how it turned out. I have some more fabric that I can use to make a couple of full size pillows and a few decorative pillows.

Should look great on our guest bed.....

Or on the couch.

Not sure which yet.

Aloha a Hui Hou!

Shared with:


mop it up mondays

UndertheTableandDreaming

Wednesday, August 15, 2012

DIY - Tired of Fingerprints and Smudges

It's been weeks since we've returned from our trip and I can't stop thinking about how smudged up the door handles of our stainless steel fridge/freezer were and how I wound up wiping them down every time I walked by. I had to come up with a solution.

In one of the care homes I worked in they wrapped the fridge door handle in Saran Wrap to keep it clean. It worked, but I didn't want to be that wasteful.

Then it came to me. Why don't I just sew "handle covers"?

I knew I wanted some kind of green, Aloha print, quilted fabric, but didn't find anything I liked at the fabric store.

On a whim, at the thrift store, I went thru the bedding isle and found a small throw in just the right color.

Cha-ching - MINE!

First, I carefully took off the bias tape so that I could reuse on my covers.

Then I took measurements and cut out what I needed to make each cover.


Then pinned the bias tape all the way around and sewed it in place.


Next I wrapped the cover to be around the handle and using a vanishing marker I marked where they over lap. 

This marks lets me know where I need to sew the velcro.


I decided to only add a few spots of velcro instead of a long strip. Thought it would be less bulky this way.


Once the velcro was in place I wrapped the cover around the handle, with opening facing me.

I pulled it nice and tight, pressed the velcro dots together.

This is our fridge in Hawaii - excited to put it on our other fridge.

Then, ever so gently, I turned the cover around so the seam was in back and wah-la! A nice cover that won't show smudges and that I can toss in the washing machine when it gets dirty!

I made 2 for the french doors, but will have to wait till we're at the house again to measure how big it has to be for the freezer drawer.

What do you think? Maybe I'll go into production!!

Aloha A Hui Hou!

Shared with:


UndertheTableandDreaming